Pale No. 3

I have been trying to dial in a good base for my paler beers and tired of dealing with Ventura’s hard water, I put my thinking cap on and came up with adding a pound of caramel 20 and a pound of white wheat to smooth things out in my pale ales and IPAs. I’ve noticed that anything that attempts to be dry to showcase the hops like a west coast IPA  just comes out too dry with hard water. On the other hand anything with some crystal or caramel in it is much smoother. I think it was a good choice.

I got a real good deal on a bunch of Stella, the Australian super Saaz, 7C’s, and Saphir hops. The Stella smelled awesome, but the 7C’s maybe had seen better days with little aroma, while the Saphir was in good shape. Saphir is quite a fragrant and under appreciated hop with a really nice citrus and fruit note in the nose.

After using both the Stella and 7C’s for bittering and aroma, I then decide to dry hop in the fermenter with the reamining 7C’s and a little Saphir and then dry hop in the keg with Saphir.

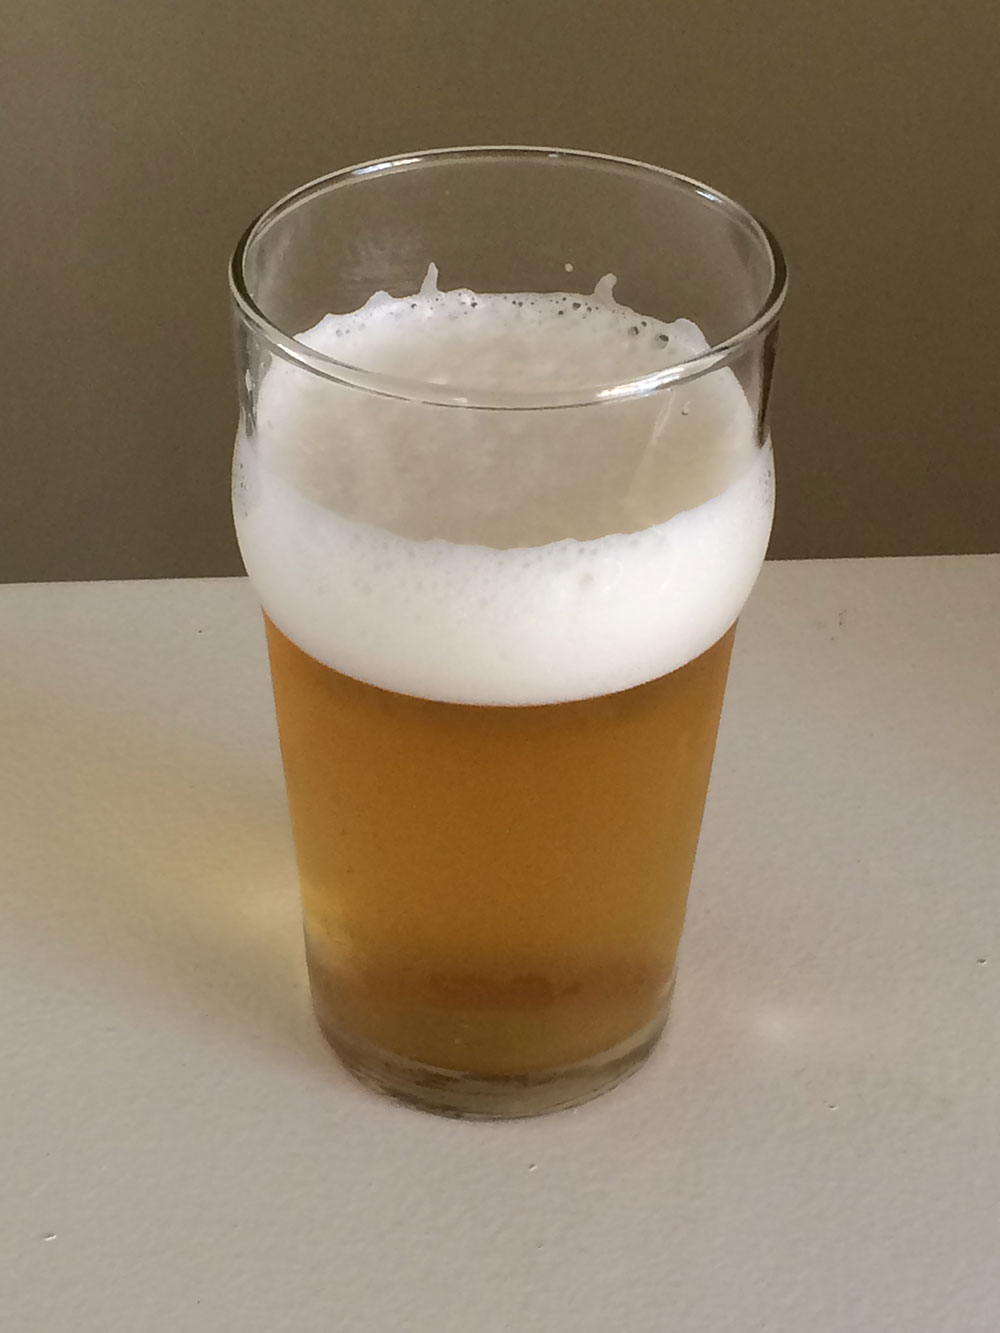
This beer turned out to be a real stunner – perfect body with just a hint of sweetness and a gripping smooth bitterness. Tropical and stone fruit aroma with just a hint of citrus and mint in the taste. Very, very easy to guzzle this beer down by the imperial pint.

6 gallons

Estimated OG: 1.058
Estimated FG: 1.014
Estimated Color: 6.6 SRM
Estimated IBU: 56 IBUs
Brewhouse Efficiency: 65.00 %
ABV: 5.8%

Grain
13 lbs Pale 2 Row (2 SRM) 86.7%
1 lbs Crystal 20 (20 SRM) 6.7%
1 lbs White Wheat (3.2 SRM) 6.7%

Schedule
60 minute Boil
28.00 g Stella [15%] – 60 min 43.3 IBUs
28.00 g Stella [15%] – Whirlpool 10 min 7.9 IBUs
28.00g 7C’s [9.5%] – Whirlpool 10 min 5 IBUs
28.00g 7C’s [9.5%] – Dry Hop  3 days (4th day of fermentation)
14.00g Saphir [3.5%] – Dry Hop 2 days (end of fermentation)
14.00g Saphir [3.5%] – Dry Hop in keg

Whirfloc or Irish Moss 20 min
1tsp yeast nutrient 15 min

Mash and Sparge
50% RO water
50% Ventura (high bicarbonates and sulfates)
2g Calcium Chloride added to mash water
4ml lactic acid added to mash water
2g Calcium Chloride added to sparge water
2ml lactic acid sparge water
Mash in 4.75 gallons water 163F and let stabilize to 152F for 60 min
Mashout 170F
Batch sparge 4.75 gallons cold

Yeast
WLP 007 Dry English Ale

Fermentation
Ferment until done 65F
Day 4 of fermentation add first charge of dry hops
End of fermentation add rest of dry hops for 2 days
Cold crash one day
Add gelatin and rack to keg and carbonate using your preferred method


The Innkeeper

I love a well made bitter. Its one of my favorite styles. Highly quaffable, sessionable, and with that “moreishness” teasing you to down another pint. Unfortunately, you just can’t find them around here. You can find a few things at Bevmo! but the age and storage on those bottles is always highly questionable, so I like to make them. Timothy Taylor Landlord is considered a classic right up there with Fuller’s London Pride. Never had the pleasure but looking at clone recipes and the grist for Northern Brewer’s oh so cleverly named “The Innkeeper,” I knew this would be a winner. Golden Promise, Crystal 120, and sugar make for a beautiful amber colored beer with a full mouth feel but with a snappy finish.

As with any recipe kit you might need to adjust your volume outcome or add some ingredients to get the finished result you desire for your equipment. With this recipe I had to add 3 pounds Maris Otter(Golden Promise is hard to find!) and 3 ounces sugar to bulk it up to get 6 gallons in the fermenter with a final yield of a bit over 5 gallons.

The finished product after two weeks was in perfect condition and the keg barely lasted over a week.

6 gallons

Estimated OG: 1.047
Estimated FG: 1.008
Estimated Color: 6.6 SRM
Estimated IBU: 29.6 IBUs
Brewhouse Efficiency: 65.00 %
ABV: 5.1%

Grain
6 lbs Golden Prmise (2 SRM) 57.2%
3 lbs Maris Otter (2 SRM) 28.6%
1 lbs Corn Sugar (0 SRM) 9.5%
4.7 ounces Extra Dark Crystal (120 SRM) 2.8%

Schedule
70 minute Boil
28.00 g Fuggles [3.8%] – 70 min 12.5 IBUs
28.00 g East Kent Goldings [4.7%] – Boil 45 min 13.7 IBUs
28.00g Styrian Goldings [5.4%] – Boil 5 min 3.4 IBUs

Whirfloc or Irish Moss 20 min
1tsp yeast nutrient 15 min

Mash and Sparge
50% RO water
50% Ventura (high bicarbonates and sulfates)
2g Calcium Chloride added to mash water
4ml lactic acid added to mash water
2ml lactic acid sparge water
Mash in 3.2 gallons water 164F and let stabilize to 153F for 60 min
Mashout 170F
Batch sparge 6 gallons cold

Yeast
Lallemand Nottingham

Fermentation
Ferment until done 70F
Cold crash one day
Add gelatin and rack to keg and carbonate using your preferred method

Patersbier

Not having ever drank a true patersbier the style nonetheless intrigued me enough to spend the rest of my Christmas gift certificate on the Northern Brewer kit as well as the Timothy Taylor Landlord clone know as the “Innkeeper.” More on the Innkeeper in a later post. Think of a patersbier as a Belgian pilsner. It contains all Belgian pilsner malt and quite a bit of noble hops but the difference being that it uses an abbey strain of yeast to add a phenolic and peppery  note to the beer.

Having already brewed and consumed it there are a few take aways on brewing this style of beer. One, the Safale Abbaye is an aggressive yeast and got a high level of attenuation but definitely had a sulfur bite and aroma to it even while fermeting on the cool side. I think I would let the fermentation free rise towards the end to blow all that sulfur out and then condition on the yeast for another week and not keg so soon. Two, with the high level of attenuation I would use a really soft water with the pale malt grist.

Besides those slight flaws it was a pretty sessionable beer but the overall consensus not a repeater. My wife commented it was “too earthy” tasting. I might revisit the style sometime in the future to see if I can nail it.

6 gallons

Estimated OG: 1.043
Estimated FG: 1.005
Estimated Color: 3.7 SRM
Estimated IBU: 27 IBUs
Brewhouse Efficiency: 65.00 %
ABV: 5.0%

Grain
12 lbs Belgian Pilsner (2 SRM) 100%

Schedule
60 minute Boil
28.00 g Tradition [6%] – Boil 60 min 19 IBUs
14.00 g Saaz [3.75%] – Boil 60 min 5.9 IBUs
14.00 g Saaz [3.75%] – Boil 10 min 2.1 IBUs

Whirfloc or Irish Moss 20 min
1tsp yeast nutrient 15 min

Mash and Sparge
50% RO water
50% Ventura (high bicarbonates and sulfates)
4ml lactic acid added to mash water
2ml lactic acid sparge water
Mash in 4.75 gallons water 157F and let stabilize to 148F for 60 min
Mashout 170F
Batch sparge 4.7 gallons cold

Yeast
Safale Abbaye

Fermentation
Ferment until done 65F
Cold crash two day
Rack to keg and carbonate using your preferred method

Hefe

It has been awhile since I brewed a hefeweizen, almost 4 years, and it was when I first moved to Ventura. I remember it was a learning experience in water chemistry. Not really having paid attention to water chemistry before, it was shocking to find out the water here is pretty unsuitable for brewing anything other than a stout,  porter, or other similarly roasty type of beers, without some kind of adjustments and treatment for a pale beer, because of the extreme alkalinity of the water. The hefe wasn’t undrinkable but had a unpleasant astringency on the finish. Ditto the next beer I brewed, a Belgian pale ale. Narrowing down the possibilities I figured it could only be the water, so I looked up the local water report.

Ventura is one of the few cities in California with it’s own water supply. Since we have been in a drought a major percentage of our water is well water and it is really, really hard. Water with a high alkalinity  has a high pH leading to problems with pale grists not able to drop the pH to a proper level for mashing and leaving a harsh minerality and astringency. Almost every brew I do now is at least 50% RO water with  filtered tap water to get it into an acceptable pH range and mineral content. Even then I usually dose with lactic and calcium chloride.

Anyhow, this is a pretty simple recipe with pils, wheat, and a dose of Munich for color. All German malts on this one. Brewed it Sunday and it’s already done this Wednesday. Will cold crash for a day and then keg. The krausen on this beer is like nothing I’ve seen before. It started with a nice inch of foam and then settled down to just producing huge soap like bubbles while it was churning away. I was a little worried so did a little research and thankfully this is not that uncommon with the White Labs Bavarian Hefeweizen strain. Tasted great out of the fermenter when I pulled a gravity reading.

6 gallons

Estimated OG: 1.048
Estimated FG: 1.010
Estimated Color: 4.4 SRM
Estimated IBU: 18 IBUs
Brewhouse Efficiency: 65.00 %
ABV: 5.0%

Grain
6 lbs German Pilsner (2 SRM) 46.2%
6 lbs German Wheat Malt (2 SRM) 46.2%
1 lbs Munich  (9 SRM) 7.7%

Schedule
60 minute Boil
28.00 g Hallertau [3.8%] – First wort 60 min 12.6 IBUs
28.00 g Hallertau [3.8%] – Boil 15 min 5.7 IBUs

Whirfloc or Irish Moss 20 min
1tsp yeast nutrient 15 min

Mash and Sparge
50% RO water
50% Ventura (high bicarbonates and sulfates)
4g Calcium Chloride added to mash water
3ml lactic acid added to mash water
2ml lactic acid sparge water
Mash in 5 gallons water 162F and let stabilize to 152F for 60 min
Mashout 170F
Batch sparge 4.5 gallons cold

Yeast
WLP351 Bavarian Weizen Yeast

Fermentation
Ferment until done 70F
Cold crash one day
Rack to keg and carbonate using your preferred method


Czech Pils v3

This is my ongoing saga of nailing what I believe to be a great Czech pils. To put the metamorphosis into perspective look at the table below

Malt Hops Water Mash Temp OG FG
1  97.4% German Pils
2.6% Carapils
 28.00 g Perle [8%] – Boil 60 min 28.4 IBUs
28.00 g Czech Saaz [3.75%] – Boil 30 min 10.2 IBUs
28.00 g Czech Saaz [3.75%] – Boil 15 min 6.6 IBUs
 100% RO
1g CaCl mash
1g CACL sparge
Pinch of Gypsum each
 148 1.048  1.011
2  93.6% German pils
6.4% Carapils
14.00 g Northern Brewer [10%] – Boil 60 min 15.8 IBUs
14.00 g Northern Brewer [10%] – Boil 45 min 14.5 IBUs
28.00 g Sterling [8%] – Boil 20 min 15.3 IBUs
28.00 g Sterling [8%] – Boil 5 min 5 IBUs
28.00 g Sterling [8%] – Boil 0 min 0 IBUs
75% RO
25% tap
2g CaCl mash
1ml lactic mash
1ml lactic sparge
152  1.047  1.012
3  96% German Pils
4% Melanoiden
 28.00 g Northern Brewer [6%] – First wort 20.4 IBUs
28.00 g Sterling [8%] – Boil 30 min 19 IBUs
28.00 g Sterling [8%] – Boil 5 min 4.9 IBUs
28.00 g Sterling [8%] – Boil 0 min 0 IBUs
75% RO
25% tap
2g CaCl mash
1ml lactic mash
1ml lactic sparge
154  1.051  Est 1.012

OK a lot of data but the overall gist is I’m not getting enough malt body. I’m close to nailing it but even mashing at 152 the beer seemed overly dry and the bitterness just a tad biting. To remedy this I decided to use Melanoiden malt, which is a German malt that basically mimics the color and taste of a decoction, instead of Carapils. I also added the bittering charge as a first wort hop. Apparently a majority of Czech brewers do this. In theory it should smooth out the bitterness.

6 gallons

Estimated OG: 1.051
Estimated FG: 1.012
Estimated Color: 4 SRM
Estimated IBU: 44.2 IBUs
Brewhouse Efficiency: 65.00 %
ABV: 5.0%

Grain
11 lbs German Pilsner (2 SRM) 93.6%
.75 lbs Carapils  (2 SRM) 6.4%

Schedule
60 minute Boil
28.00 g Northern Brewer [6%] – First wort 60 min 20.4 IBUs
28.00 g Sterling [8%] – Boil 30 min 19 IBUs
28.00 g Sterling [8%] – Boil 5 min 4.9 IBUs
28.00 g Sterling [8%] – Boil 0 min 0 IBUs

Whirfloc or Irish Moss 20 min
1tsp yeast nutrient 15 min

Mash and Sparge
75% RO water
25% Ventura (high bicarbonates and sulfates)
2g Calcium Chloride added to mash water
1ml lactic acid added to mash water
Mash in 5 gallons water 163F and let stabilize to 154F for 60 min
Mashout 170F
Batch sparge 4.5 gallons cold

Yeast
Saflager S-23 2 packs

Fermentation
Ferment 5 days at 57F
Let free rise 67F and hold for 3 days
Take gravity reading and if terminal cold crash to 28F for 1 day
Add fining – 1tsp gelatin to cup of boiling water and stir to dissolve and let settle 1 day
Rack to keg and let carbonate – depending on your preferred method to carbonate it will be ready to drink but I found on the last batch at least a week was optimal for conditioning, so were looking at around 3 weeks from “grain to glass” for best results.

Taylor’s Pale

My wife’s cousin is graduating from UCSB and we’re hosting her graduation party so I was asked (twist my arm) to brew something approachable for the whole gang. I was thinking a blonde ale but it just seemed a little too ho hum. I have been wanting to see the difference how a hop stand versus flameout additions taste and smell, so here’s a pale ale to test out hop standing. There is no bittering hop additions – all additions are at 5 and 0 and then you turn off the heat and let the hops steep for 20 minutes before turning on the chiller. Hop selection at the homebrew store is starting to get grim – no chinook, cascade, centennial, or citra. Went with Calypso and Jarrylo which are both pretty tropical with the Jarrylo being very pungent. The wort was smelling amazing in the fermenter. Hopefully all those beautiful aromas don’t all off gas during fermentation!

6 gallons

Estimated OG: 1.051
Estimated FG: 1.014
Estimated Color: 6.6 SRM
Estimated IBU: 43.3 IBUs
Brewhouse Efficiency: 70.00 %
ABV: 4.8%

Grain
10.25 lbs Pale Two Row (2 SRM) 85.4%
1.25 lbs Vienna  (3.5 SRM) 10.4%
.5 lbs Caramunich II (63 SRM) 4.2%

Schedule
60 minute Boil
28.00 g Calypso [13%] – Boil 5 min 8 IBUs
28.00 g Jarrylo [15%] – Boil 5 min 9.2 IBUs
28.00 g Calypso [13%] – Steep 20 min 12.1 IBUs
28.00 g Jarrylo [15%] – Steep 20 min 14 IBUs

Whirfloc or Irish Moss 20 min
1tsp yeast nutrient 15 min

Mash and Sparge
50% RO water
50% Ventura (high bicarbonates and sulfates)
3g Calcium Chloride added to mash water
2ml lactic acid added to mash water
3ml lactic acid added to sparge water
Mash in 4.65 gallons water 163F and let stabilize to 154F for 60 min
Mashout 170F
Batch sparge 4.75 gallons cold

Yeast
WLP 001 Cal Ale no starter

Fermentation
Ferment 3 days at 65F
Let free rise 70F and hold for 4 days
For Cal Ale let it start to drop before crashing
Take gravity reading and if terminal cold crash to 28F for 1 day
Add fining – 1tsp gelatin to cup of boiling water and stir to dissolve and let settle 1 day
Rack to keg

Czech Pils V2

This is another go at the two week lagering method. This time however, I have created the recipe for my system and made some minor tweaks such as adding a bit more carapils and mashing a a little higher for more  mouth feel in the body. One of the landmarks of a good Czech pils is its nice malty body. I have not been able to source any Saaz at all locally so Sterling, which is a gorgeous and under utilized hop in itself, will make a good substitution. Added some flameout hops also, hoping to catch just a bit more hop aroma.

6 gallons

Estimated OG: 1.047
Estimated FG: 1.012
Estimated Color: 4 SRM
Estimated IBU: 50.7 IBUs
Brewhouse Efficiency: 65.00 %
ABV: 4.6%

Grain
11 lbs German Pilsner (2 SRM) 93.6%
.75 lbs Carapils  (2 SRM) 6.4%

Schedule
60 minute Boil
14.00 g Northern Brewer [10%] – Boil 60 min 15.8 IBUs
14.00 g Northern Brewer [10%] – Boil 45 min 14.5 IBUs
28.00 g Sterling [8%] – Boil 20 min 15.3 IBUs
28.00 g Sterling [8%] – Boil 5 min 5 IBUs
28.00 g Sterling [8%] – Boil 0 min 0 IBUs

Whirfloc or Irish Moss 20 min
1tsp yeast nutrient 15 min

Mash and Sparge
75% RO water
25% Ventura (high bicarbonates and sulfates)
2g Calcium Chloride added to mash water
1ml lactic acid added to mash water
Mash in 4.65 gallons water 161F and let stabilize to 152F for 60 min
Mashout 170F
Batch sparge 4.75 gallons cold

Yeast
Saflager S-23 2 packs

Fermentation
Ferment 5 days at 57F
Let free rise 67F and hold for 3 days
Take gravity reading and if terminal cold crash to 28F for 1 day
Add fining – 1tsp gelatin to cup of boiling water and stir to dissolve and let settle 1 day
Rack to keg and let carbonate – depending on your preferred method to carbonate it will be ready to drink but I found on the last batch at least a week was optimal for conditioning, so were looking at around 3 weeks from “grain to glass” for best results.

Mash Tun Insulator

I have been wanting to get a better grip on controlling the mash temperature probably since day one of all grain brewing. Problem is, it takes more equipment if you are using a kettle or a converted keg. First you need a good  thermometer that is calibrated on your keggle or kettle. Once you’re able to read the mash temperature then you need someway of keeping the mash temperature stable. I find that the larger the grist the more stable the temps remain. My current method is that I will take a  thermometer reading every ten minutes or so and then stir the mash to make sure no stratification is happening. Usually this leads to me firing the tun back up and stirring the mash to ensure no scorching occurs to get the temp back up. This method works OK but the temp can yo yo a bit especially if you aren’t keeping a close eye on it.

Another method is recirculation. This method usually involves a system with another kettle with a burner or heating element on it and a pump recirculating the wort over or through the grain bed continuously. There usually is some kind of thermostat controlling the burner or heating element on the other kettle to ensure a stable mash temp. This system works great but you need a pump, another kettle, silicone hosing, disconnects, and some kind of control system to fire the heat on and off. This can get a bit pricey as you can imagine.

Another and much more affordable method is insulation. Search the internet and you will see all sorts of ways to insulate a mash tun from spray foam insulation to large tea cozies made from blankets. I went with the tea cozie idea because it was cheap and quick to do, especially if you already have some key tools.

What you’ll need

  • Pair of sharp scissors
  • Glue gun
  • Clamps
  • Marker
  • Tailor’s measuring tape or regular measuring tape will work.
  • Roll of Reflectix preferably 2′ x 25′ if not 16″ x 25′ works as well (Lowes or Home Depot will carry it)
  • Roll of aluminum duct tape.
  • Velcro tabs 4 pieces 2 inch long

If you already have the scissors, glue gun, clamps, and measuring tape your going to spend a grand total of about $20-$24.

Mash Tun Insulator Instructions

  1. Take your measuring tape and measure  the  circumference at the widest point of your kettle or keg  and then tack on a couple of inches for play.
  2. Unroll the Reflectix and measure out two lengths from step 1. Depending on the size roll of Refelctix you bought, you might need to measure out 4 lengths and seam some pieces together with the aluminum tape to get your correct height – remember you want to cover the whole tun with it and an inch or so higher than total height.
  3. Take your 2 pieces of Reflectix and match them up and clamp one end with two clamps so the pieces stay in alignment while you hot glue.
  4. Take your hot glue gun and run a bead down the height every 3 inches or so till you come to the end. the glue dries fast but press firmly for about a minute to make sure you get good adhesion.
  5. Now take your glued piece and wrap it around your tun right above your outlet. Mark off on the Reflectix where your outlet is and think about where the end pieces are going to meet when you wrap the cover around the tun. If you have more than one outlet, say a ball valve and a thermometer, do one at a time so you have a nice snug fit starting with the the outlet highest on the tun.
  6. On your tun measure how far from the bottom of the tun the outlet is.
  7. From the marks on the Reflectix take your measurements of outlet height and measure up and mark – helps to use a square.
  8. Make cut in Reflectix using marks from bottom up.
  9. Measure outlet width and using the previous marks measure over for the slot you are going to cut for outlet. Mark and cut.
  10. If you have just one outlet you’re done and skip to #12.
  11. Slip Reflectix over outlet you just cut for and measure other outlet. Make sure your cover is nice and snug and the ends are overlapping or at least meeting. Repeat steps 6-9.
  12. We are now going to construct our close tab for the insulator. This is just a strip of Reflectix that will attach to both ends with some velcro tabs. Cut a piece of Relectix 4-6″ wide by the height of your tun.
  13. Wrap the cover over the tun and get it pretty snug but not super tight – Reflectix works best with a little air between it and whatever it is insulating. Mark where you want to put the velcro tabs on each end of the cover.
  14. Add velcro tabs to cover.
  15. Take cover off and take the close tab and lay over one end of cover and align where first set of velcro tabs will attach and mark. Add velcro to close tab and attach to cover.
  16. Slip cover back on tun and pull snug so to measure where the velcro on the other end lines up with the close tab. Mark the close tab and add velcro to close tab.
  17. Slip cover back on and close up. Velcro should allow for a little play so its snug but not super tight. Cover should cover the bottom of kettle all the way up to the top with about an inch overlap or so. If outlet cuts are not allowing cover to reach bottom trim a bit to adjust.
  18. Last but not least we are going to construct the lid. Take a piece of Reflectix and make sure it covers entire top of tun with insulating cover on. If you need to seam some pieces together with tape do that. Cut it to size and lay over the  tun with cover on and then use a marker using the outside of tun cover as a guide and mark your circle. Cut out circle and now use this piece as a template for second piece. Glue the 2 pieces together.
  19. The lid insulation piece might be a tad big but you’ll want this a tight fit so no heat escapes. You can trim it up a bit to get desired fit. You’ll also want to cut a notch for the handle in the  lid if you’re using a kettle for a tun. If you’re using a keg this should not be and issue – the insulating lid should fit over the lid and handle. To get a notch in the center of the circle cut a hole in the center of lid and cut from there.

Tun Cozy Lid

Mash Tun Insulation with close tab

Mash Tun Insulation with close tab attached with velcro

So there you have it. An affordable mash tun insulator that takes about an hour to construct. Oh yeah, I would not suggest firing the tun with this on. Reflectix can melt at extreme heat. The insulator is meant to be put on right after dough in. I had a one degree drop over an hour long mash. Impressive and no more fiddling around with the mash!

NZA

I was going to make an IPA using the same hop schedule as the American Stock ale I made about three weeks ago which consisted of El Dorado and Citra, which really paired well together. Unfortunately, El Dorado is in very limited supply. On the fly at the homebrew supply I decided to use all New Zealand hops instead, plus they are more affordable at $2.00 an ounce instead of $2.50 and $3.00 for El Dorado and Citra. Trying to stay within the citrusy taste, I went with Pacific Jade and Wakatu. I used Wakatu, also know as New Zealand Hallertau, with really good results as a dry hop before. Pacific Jade is an unknown to me but I liked the descriptors of citrusy, spicy and herbal while Wakatu has citrusy characteristics of lime and the last time I used it was very floral.

6 gallons

Estimated OG: 1.065
Estimated FG: 1.012
Estimated Color: 8.2 SRM
Estimated IBU: 56.7 IBUs
Brewhouse Efficiency: 65.00 %
ABV: 6.8%

Grain
14 lbs Pale Two Row (2 SRM) 90.3%
1 lb Turbinado Sugar (10 SRM) 6.5%
0.5 lbs Bairds Crystal 77 (80 works fine) (80 SRM) 3.2%

Schedule
60 minute Boil
28.00 g Warrior [15%] – Boil 60 min 41.7 IBUs
28.00 g Pacific Jade [15%] – Boil 7 min 11.2 IBUs
28.00 g Wakatu [7.5%] – Steep/Whirlpool 10.00 min 3.8 IBUs
28.00 g Pacific Jade [15%] Dry hop 3 days
28.00 g Wakatu [7.5%] Dry hop 3 days

Whirfloc or Irish Moss 20 min
1tsp yeast nutrient 15 min

Mash and Sparge
50% Ventura water (very high sulfates and bicarbonates)
50% RO water
4g Calcium Chloride added to mash water
4ml Lactic Acid added to mash water
2ml Lactic Acid added to sparge water
Mash in 5.75 gallons water 162F and let stabilize to 152F for 60 min
Mashout 170F
Batch sparge 4 gallons cold

Yeast
WLP 022 Essex Ale 2L starter

The Two Week Lager – Czech Pils tasting

2 week lagerI believe my first foray into rapid lagering was a success as far as producing a very drinkable beer in two weeks. Very debatable that this is a Czech pils however. Beer is as dry as a bone so its actually tasting more like a German Pils. Reviewing my notes on the brew day I see “mash dropped to 137F so slowly ramped up to 167 to mash out.” Oops. I think I wasn’t paying attention to the mash. My tun isn’t insulated and if I start doing things and get distracted and let it slip below 148F, which by the way, I thought was a bit low to begin with in BeerSmith, I have to fire up the tun again to keep it steady. Next project – insulating that puppy.

So let’s break this method down and see what I observed.

  • Cooled wort to 55 and pitched 2 packs of Saflager S-23 directly into wort.
  • Let rise to 57 and held for 5 days.
  • 4 hours after pitch detectable smoke on surface. Next morning fermentation going with nice krausen.
  • End of day 5 noticeable slowing of fermentation and moved fermentor into house and slowly rose to 66F over 1 day and held around 66-67F for 3 days.
  • End of day 8 very noticeable clearing.
  • Day 9 took gravity reading 1.011 – 3 points off but thought good since OG a tad high anyhow.
  • Put back in fridge and crashed to 30F.
  • Day 10 added 3/4 tsp. gelatin.
  • Day 11 racked to keg and turned up psi to 15 while beer at 28F.
  • Day 12 pulled 1/2 pint to check clarity – still a little murky and pulling dregs off bottom of keg and dialed back psi to 11 and rose fridge temp to 39F.
  • Day 13 pulled 1/2 pint with a bit of floaters and then pulled full pint(pictured) – nice and clear.

Just a hint of acetaldehyde but that could be the yeast and maybe would lager out.  Not too sure but it almost had that Mexican lager smell like Tecate or Modelo Especial. Very firm bitterness but not much hop aroma or flavor left from the Saaz additions – a dry hopping would have done wonders to this I think. Definitely not malty enough but a nice dry German pils instead. Nothing stellar but a very drinkable beer.

In conclusion I’m a believer in this quick lagering method. I think if I use a recipe designed by me with my equipment in mind instead of a NB 5 gallon premade kit (really who gets five gallons out of these!) and really keep on eye on that mash temperature, I will have my Czech pils in two weeks.