I have been wanting to get a better grip on controlling the mash temperature probably since day one of all grain brewing. Problem is, it takes more equipment if you are using a kettle or a converted keg. First you need a good thermometer that is calibrated on your keggle or kettle. Once you’re able to read the mash temperature then you need someway of keeping the mash temperature stable. I find that the larger the grist the more stable the temps remain. My current method is that I will take a thermometer reading every ten minutes or so and then stir the mash to make sure no stratification is happening. Usually this leads to me firing the tun back up and stirring the mash to ensure no scorching occurs to get the temp back up. This method works OK but the temp can yo yo a bit especially if you aren’t keeping a close eye on it.
Another method is recirculation. This method usually involves a system with another kettle with a burner or heating element on it and a pump recirculating the wort over or through the grain bed continuously. There usually is some kind of thermostat controlling the burner or heating element on the other kettle to ensure a stable mash temp. This system works great but you need a pump, another kettle, silicone hosing, disconnects, and some kind of control system to fire the heat on and off. This can get a bit pricey as you can imagine.
Another and much more affordable method is insulation. Search the internet and you will see all sorts of ways to insulate a mash tun from spray foam insulation to large tea cozies made from blankets. I went with the tea cozie idea because it was cheap and quick to do, especially if you already have some key tools.
What you’ll need
- Pair of sharp scissors
- Glue gun
- Clamps
- Marker
- Tailor’s measuring tape or regular measuring tape will work.
- Roll of Reflectix preferably 2′ x 25′ if not 16″ x 25′ works as well (Lowes or Home Depot will carry it)
- Roll of aluminum duct tape.
- Velcro tabs 4 pieces 2 inch long
If you already have the scissors, glue gun, clamps, and measuring tape your going to spend a grand total of about $20-$24.
Mash Tun Insulator Instructions
- Take your measuring tape and measure the circumference at the widest point of your kettle or keg and then tack on a couple of inches for play.
- Unroll the Reflectix and measure out two lengths from step 1. Depending on the size roll of Refelctix you bought, you might need to measure out 4 lengths and seam some pieces together with the aluminum tape to get your correct height – remember you want to cover the whole tun with it and an inch or so higher than total height.
- Take your 2 pieces of Reflectix and match them up and clamp one end with two clamps so the pieces stay in alignment while you hot glue.
- Take your hot glue gun and run a bead down the height every 3 inches or so till you come to the end. the glue dries fast but press firmly for about a minute to make sure you get good adhesion.
- Now take your glued piece and wrap it around your tun right above your outlet. Mark off on the Reflectix where your outlet is and think about where the end pieces are going to meet when you wrap the cover around the tun. If you have more than one outlet, say a ball valve and a thermometer, do one at a time so you have a nice snug fit starting with the the outlet highest on the tun.
- On your tun measure how far from the bottom of the tun the outlet is.
- From the marks on the Reflectix take your measurements of outlet height and measure up and mark – helps to use a square.
- Make cut in Reflectix using marks from bottom up.
- Measure outlet width and using the previous marks measure over for the slot you are going to cut for outlet. Mark and cut.
- If you have just one outlet you’re done and skip to #12.
- Slip Reflectix over outlet you just cut for and measure other outlet. Make sure your cover is nice and snug and the ends are overlapping or at least meeting. Repeat steps 6-9.
- We are now going to construct our close tab for the insulator. This is just a strip of Reflectix that will attach to both ends with some velcro tabs. Cut a piece of Relectix 4-6″ wide by the height of your tun.
- Wrap the cover over the tun and get it pretty snug but not super tight – Reflectix works best with a little air between it and whatever it is insulating. Mark where you want to put the velcro tabs on each end of the cover.
- Add velcro tabs to cover.
- Take cover off and take the close tab and lay over one end of cover and align where first set of velcro tabs will attach and mark. Add velcro to close tab and attach to cover.
- Slip cover back on tun and pull snug so to measure where the velcro on the other end lines up with the close tab. Mark the close tab and add velcro to close tab.
- Slip cover back on and close up. Velcro should allow for a little play so its snug but not super tight. Cover should cover the bottom of kettle all the way up to the top with about an inch overlap or so. If outlet cuts are not allowing cover to reach bottom trim a bit to adjust.
- Last but not least we are going to construct the lid. Take a piece of Reflectix and make sure it covers entire top of tun with insulating cover on. If you need to seam some pieces together with tape do that. Cut it to size and lay over the tun with cover on and then use a marker using the outside of tun cover as a guide and mark your circle. Cut out circle and now use this piece as a template for second piece. Glue the 2 pieces together.
- The lid insulation piece might be a tad big but you’ll want this a tight fit so no heat escapes. You can trim it up a bit to get desired fit. You’ll also want to cut a notch for the handle in the lid if you’re using a kettle for a tun. If you’re using a keg this should not be and issue – the insulating lid should fit over the lid and handle. To get a notch in the center of the circle cut a hole in the center of lid and cut from there.
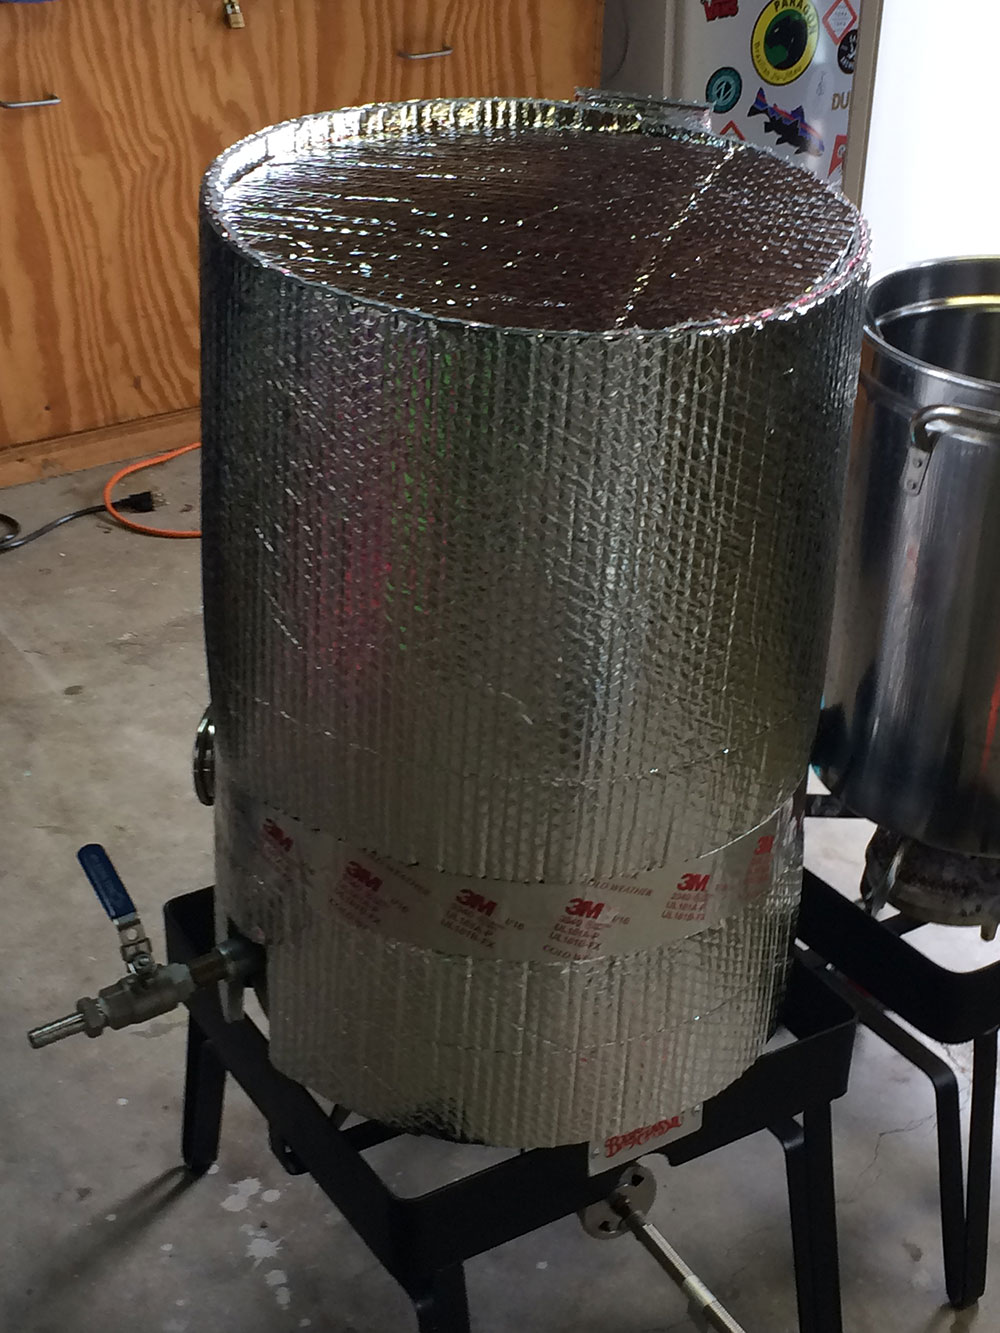

Mash Tun Insulation with close tab attached with velcro
So there you have it. An affordable mash tun insulator that takes about an hour to construct. Oh yeah, I would not suggest firing the tun with this on. Reflectix can melt at extreme heat. The insulator is meant to be put on right after dough in. I had a one degree drop over an hour long mash. Impressive and no more fiddling around with the mash!